The great thing about night photography is that subjects that appear commonplace during the day take on a new, interesting appearance at night. Urban scenes are lit (or not lit) at night in fundamentally different ways that our eyes are not used to. The long exposure times required in night photography allow you to use different techniques to capture the scenes in creative and often dramatic ways. Plus you aren’t beholden to the sun’s rays and the changing daytime light.
Nevertheless, you may struggle with finding good subjects when you do have opportunities to get out and shoot at night. Further, you may not know what subjects lend themselves to great photographs at night, or overlook great scenes and subjects in your own city. Therefore, this article is designed to help you pick out some good subjects that might be right around the corner.
Obviously, the point here is not to limit your subject matter, but rather to show you things that might be nearby next time you are stumped for ideas. I hope you’ll use these subjects as starting points for your own thinking, and the go well beyond the ideas presented here.
Reflections

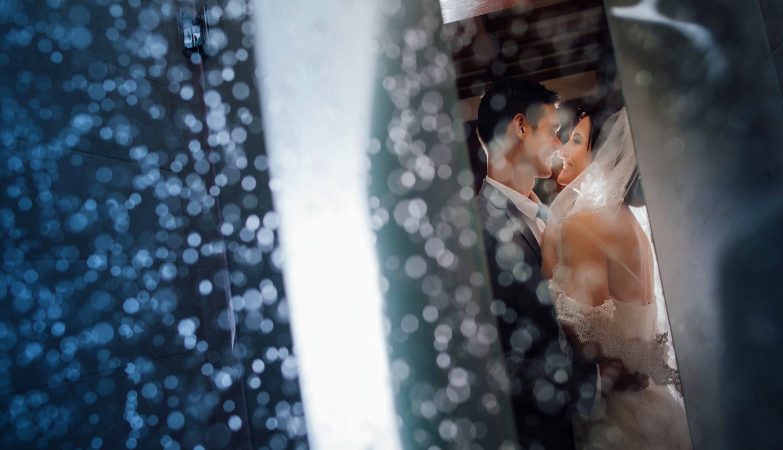
Most cities have plenty of modern office buildings made of glass and steel. These are often not particularly photogenic subjects in themselves, but the glass and steel provide great opportunities for capturing reflections of anything nearby. At night, the glass can appear particularly reflective. The bright lights of the city at night will show up clearly in the glass of nearby buildings. The next time you are downtown, keep an eye out for reflections in those glass buildings.
Of course, water presents a great opportunity for capturing reflections as well. A very slow shutter speed will remove any ripples from the water and make the reflection show up more clearly. Using a slow shutter speed will not usually be a problem at night because your camera will be struggling to capture more light to achieve a proper exposure, but if it is just add a mild neutral density filter to your lens.
Keep in mind that the water with the reflection doesn’t have to be a lake or a river (although those often work great); sometimes just a puddle will do.
Streaking Lights

Streaking headlights and taillights from passing vehicles are a great way to deal with the problem of traffic in your picture, and as a bonus, it adds a sense of movement to your scene.
To include streaking lights, start by using a slow shutter speed. You will typically set a shutter speed of at least 15 seconds to allow enough time for the vehicles to move through your frame. Set a mid-range aperture (around f/8) and a low ISO (100) to accommodate the long shutter speed, then adjust from there depending on conditions. After that, just wait until traffic is about to enter your frame and trip the shutter. The shutter will stay open during the time the traffic moves through the frame and only the headlights and taillights of the passing vehicles will show up in your picture.
Where should you go to find good places for streaking lights? That depends. If you just want the streaking lights to accentuate a picture of something else, then you can go anywhere. If you want the streaking lights to be the cneterpiece of the photo, however, you will need to find a place where you can overlook a highway or major street. Bridges and overpasses work great for this. In addition, parking garages that are next to a highway can work great as well (if you can access them).
Skylines

Skyline shots nearly always look great at night. In every city, the buildings will be lit, and will contrast against the black sky. Further, you don’t have to worry about a lot of things that cause problems during the day. For example, there will be no glare from front-lit buildings, or shadows from backlit buildings. For the most part, cloud conditions do not matter.
The key is to find a good vantage point. If your city has a river or bay your can shoot across, those make great spots. Another good choice is a high spot overlooking the skyline (look for overpasses of highways leading into downtown). Make liberal use of Google Maps’ street view to find good vantage points.
Monuments

The best part about photographing monuments at night is that they are usually well-lit. Further, the night provides a different perspective on a monument that might otherwise be commonplace.
The worst part about monuments is that, even at night, they can attract a lot of people. The long exposures required at night can help you eliminate them though. By using an extremely long shutter speed (over 30 seconds, so you will need to use Bulb mode), any people that happen to walk through your view will not show up in the final picture. Of course, if the people happen to stop walking and stand around in your frame, they will show up and you will have to use the Clone Stamp tool in Photoshop later to get rid of them.
Remember that many times the lights of monuments are not kept on all night. They seem to go out around midnight.
Fireworks

It doesn’t have to be the 4th of July or some major celebration to find a fireworks display. Many cities and towns now have fireworks displays on a regular basis as a means to draw people to local business. For example, the picture above of fireworks over St. Louis was taken on a random weekend. In addition, I live near a lake in Texas that has fireworks every weekend during the summer. See if you can find a fireworks display near you.
The key to capturing fireworks displays is to use the right shutter speed, and time the explosions. A shutter speed of around 10-15 seconds seems to work the best. That provides enough time for the fireworks to fully explode, but is not so long that the fireworks don’t show up well. Trigger the shutter when you see the dot of the firework going up. That way your picture will capture the explosion from beginning to end. After a while, you’ll develop a feel for when things are about to happen based on the rhythm of the fireworks show and you can trigger the shutter then.
Individual Buildings

Don’t overlook shots of individual buildings. I know . . . it sounds boring. If you photographed an individual building during the day, you would end up with something really uninteresting. But you’ll be surprised at how certain buildings look at night, be on the lookout for ones with interesting lights. There is no better way to find them than to just pound the pavement.
Don’t look just for brightly-lit buildings either. Industrial buildings and scenes have great shapes and textures to them, often better than anything modern. While you might not want to be trolling around in an abandoned factory, there are plenty of historical public structures or working factories you can photograph from the street.
Streetlights

If you can find a row of streetlights, it will often make a great subject. It can also be a great way to accentuate a picture of something else.
Sometimes you will want to create a starburst effect to the lights. To do that, stop down your aperture to a very small setting, somewhere in the range of f/16 – f/22. The lights will appear to twinkle in the result.
Carnivals

Carnivals are all about bright lights, vibrant colors, and movement. As such, they can be great places for the prepared night photographer.
Carnivals don’t happen every day, so you’ll need to plan ahead. Most metropolitan areas have publications listing all upcoming events. If nothing else, you can check a guidebook for your city.
Once you are there, set your exposure so that your shutter speed is in the range of 8-15 seconds. That will capture the movement of the carnival in your shot. This will usually allow you to use a low ISO to keep noise under control and a moderate aperture so that you will have a sufficient depth of field.
Museums

Museums are places that cities want to show off. As a result, most museums present dramatic facades, and are well lit at night. They are an easy way to find a good subject for night photography.
In addition, you will not have to search for museums. All museums will be listed in every guidebook or tourism website for your city. There are often several museums to choose from. Just find the most attractive one and check it out.
Once you get there, the key to success is composition. Start with the obvious frontal shot, and then work the scene from there, trying out different angles and perspectives.
Neon

Flashing signs are everywhere, and can be easily overlooked. Next time you are out, make a point to include the signs in your picture.
Overlooks And Views

A good view can present a great opportunity for photography at any time, and nighttime is no exception. Be careful though – a great view does not necessarily make a great picture. The key to success often lies in the foreground. Make sure there is something of interest in the foreground draw your viewer into the great view.
Finding a great view can be difficult. This is particularly true at night, since often the parks or towers from which you capture the view are closed. The best way I have found to find great views is to use guidebooks for your city. Sometimes the guidebook will actually have a section on the best views. If that doesn’t work, take a look at the map on 500px to see what views others have found.
Bridges

When in doubt, find a bridge to photograph at night. While your city may not have the Brooklyn Bridge or the Golden Gate Bridge, I can almost guarantee you that it will have a bridge, and that it will be well lit at night. Almost every city is built on a river or a bay, meaning there will be bridges. They are always lit.
The key is to find the best vantage point to view the bridge. In your quest to find this, there is no greater tool than the street view function of Google maps. Using Google maps, find the main bridge(s) of your city and then, at either end, virtually walk around using street view. Be sure you find a place to park as well, as this is often tricky around bridges.
Take special notice of the water under the bridge. There will be two effects related to the water. First, the long exposure time will smooth out the water. In rivers it will sometimes show a smooth current. Second, the lights from the bridge will often create reflections in the water. As such, if you can maneuver to use the water as your foreground, you may be rewarded.
When photographing a bridge, don’t overlook the passing traffic. You might be able to incorporate streaking lights from the cars as an element of the shot. As mentioned above, make sure you time the exposure right so that you start it right as traffic is about to enter the frame.
Fountains

Many central plazas and squares are centered around a fountain, and these are usually brightly lit at night. They are great places to start when looking to photograph a city a night. What’s more, photographing at night works to your advantage when you find such a fountain. The slow shutter speeds that are required by the low-light scene allow the water to flow while your shutter is open. This makes the water appear smooth.
Start with a low to mid-range ISO (100-400) and a moderate aperture (around f/8). Start with these settings, then adjust your shutter speed to get the correct exposure ought to result in a sufficiently slow shutter speed to create the smooth, flowing water you want.
Conclusion
Night takes up roughly half of each day. Further, it is often easier to get out and shoot at night because most of our work and family obligations take place during the daylight hours. So get out and shoot in your town. Even if you do not live in a major city – many moderate-sized metro areas have most, if not all, of the same subject matter.
When you do start planning night photography, you’ll be surprised how many of the subjects above are near you. It just takes a little effort and advance thought. So check out the available subjects nearby and get after it.
originally posted on digital-photography-school.com by Jim Hamel
About Author: Jim Hamel excels in showing aspiring photographers simple, practical steps for improving their photos. He is the creator of several courses here at Digital Photography School, including the popular 31 Days to Becoming a Better Photographer course. His book Getting Started in Photography has helped many begin their photographic journey. You can see his work on his website: JimHamelPhotography.com
