This post is all about how to take great twilight portraits during the low-light conditions of that time of day. Twilight photography may not sound particularly difficult. But I assure you if you try to shoot in auto mode, or even a priority mode, you will really struggle to produce good results. It’s not hard when you know what you’re doing and that’s exactly what I aim to teach you in this post.
Twilight Photography Test Shot
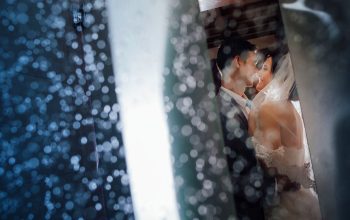
When ever I find a location that I want to use, I take a test shot on a setting that I think might work and go from there. A lot of the time, when I’m in an unfamiliar or rapidly changing lighting situation, these photos come out pretty poorly. A great example of just how poor these can be is the photo below. I’ve not yet got a flash out.

This test shot was not to see what the photo would look like if I didn’t use a flash. I knew I was going to have to use one. It was to test the exposure of the ambient light in the background. When I take photos at night with models, I always want to include some ambient light in the background. It adds to the interest of the photo. After all, who says a pixel on the face is more important than on the background.
Flash
For the next step I added a flash. And, after a bit of fiddling around, I found a setting that I liked. The only problem was that the flash exposure was turned up 1 ev and the aperture was slightly narrower, at f/4, with a shutter speed of 1/40, allowing less ambient light in. I liked how the light from the flash looked. But it was clear that I was going to have to change some of the settings with the exposure.

To create this shot, I used a special diffuser. The same effect can easily be created using a regular flash and a cheap £4 diffuser. Before we go any further, it’s important to make sure that your flash is set to high speed sync. This allows it to work differently and at much higher shutter speeds. Without this setting on, my flash will only work to 1/250 of a second. My flash is also set up wirelessly and will require some sort of transmitter. You can read all about that here.
Flash Diffusion
The reason I asked a model to come and take photos with me was because I wanted to test out my new beauty dish and grid cover. A beauty dish sends out indirect light. This is bounced around the dish before illuminating the subject. The grid that goes in front takes this soft light and forces the light through the holes at the front, into a straight line and over my subject.

The resultant soft light still allows natural shadows to form on the model’s face and body. The end result (in my final photo) makes the light look as though it’s coming from a long way away, from a much larger, yet soft, light source.
Exposure
To allow more light in, I kept my ISO on 1000, at f/2.8 for 1/30 of a second. Clearly, this allowed more light in than before but, because the photo was too dark, the grain became much more noticeable.
The thing about digital grain is that you’re left with uneven colour with an almost grey and red tinge to it. This is no good for the type of photo that I’m trying to achieve, which is supposed to be soft lighting, plenty of ambient light and lots of of clean, soft and sharp features on the model.

So I tried to find a compromise between the flash and ambient light. In step 2, I reduced the flash exposure down 2 stops to -1ev. This didn’t work quite as well as I had planned but it’s all part of the process.
Exposure Part II And Background
As you can see, the lack of grain in this photo makes a world of difference when compared to the photo above. I changed my lens to a f/1.4 prime lens – that allows four times more light into the lens when it’s set to its maximum aperture. This allowed me to lower my ISO to 640 and, on top of that, I slowed my shutter speed down to 1/6.

The reason I was able to get away with such a slow shutter speed was because the initial burst of flash was powerful enough to freeze most of the motion. Any movement in the darkness struggled to shine through. You will notice, however, that there is a little bit of movement on the right side or the face. I fixed it by raising the shutter slightly in the next photo.
Positioning And Background
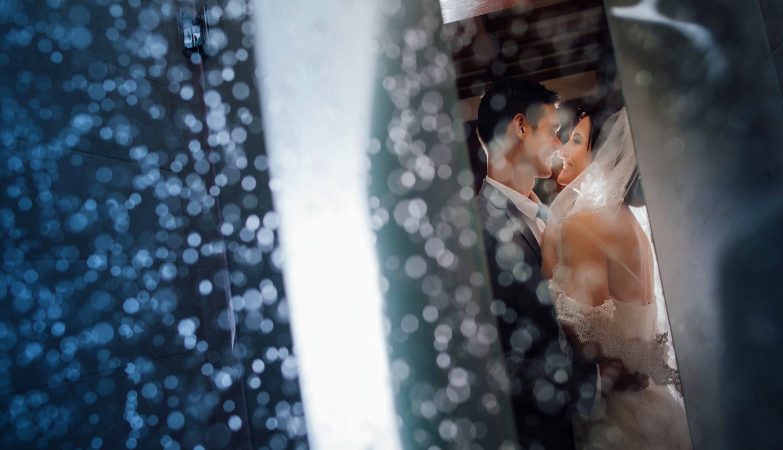
After examining my photo above, I decided that I wasn’t entirely happy with the background lighting. The light all seemed to blur into one. So I rotated my model and positioning to capture the lights along the pier.

Other than raising my ISO to 800 to account for my slightly higher shutter speed of 1/6 of a second, the settings applied are exactly the same as before. Even though I shot this photo at f/1.4, I could keep the photo looking sharp. This is because I very carefully focused on the model’s eyes – where your eyes are drawn. The rest of the photo, particularly the skin, looks very soft because it is soft.
This combination works really well at night as it produces a great effect whilst allowing as much light as I need to work with. The final settings for this photo were ISO 800, f/1.4 at 1/6 of a second with the flash power boosted to +1ev.
originally posted on expertphotography.com by Josh Dunlop